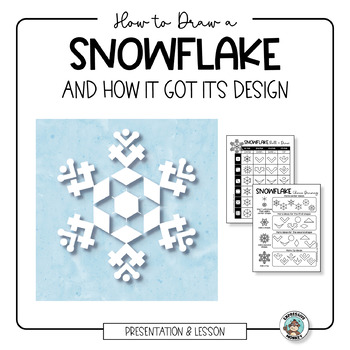
How to Draw a Snowflake • Winter Art Project • Science, Math, and Art
- Zip
What educators are saying
Also included in
- Winter art lessons that are loaded with fun, hands-on activities to help your elementary art students build drawing and art concepts!Drawing can be tricky for kids. This packet makes learning to draw a breeze. Engaging, FUN, and NO PREP worksheets help students become confident at drawing, even if yPrice $39.00Original Price $48.00Save $9.00
Description
How to draw a snowflake for your winter art project. Learn the science behind how snow crystals are formed and what affects the designs.
Why are no two snowflakes alike? We’ve all heard that phrase, but what makes them different?
Students will learn the science and math behind a snowflake. What makes snowflakes unique? How do snow crystals get their design?
Then students will use Expressive Monkey’s fun drawing pages to design their own snowflakes.
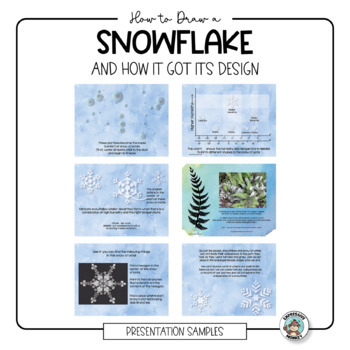
This fascinating lesson includes a presentation about snowflakes, a technique demonstration for an art project, and all the handouts you need to review vocabulary, make snowflake drawings, and assess students.
The presentation includes information about how temperature and humidity effects the design of a snowflake and photomicrographs by W. A. Bentley that students can examine to see examples of snow crystal designs.
Your students will:
- Fill out a pre-assessment about how snowflakes are made.
- Watch a Presentation about how the temp. and humidity creates different snowflake designs
- Fill out a post-assessment about how snowflakes are made.
- Review science and math vocabulary with the definition sheet and word wall words.
- Learn how to use a protractor & ruler to make 6 arms of a snowflake.
- Use design ideas to make a snowflake design using radial symmetry.
- Use a color media to add color to the snowflake background.
- Fill out a label and rubric.
INTEGRATE:
- Science - molecules of water
- Science - weather
- Math - fractals
- Math - hexagon
- Math - degrees of circle/use of protractor
- Writing - summarize learning
What You Get:
- Snowflake Presentation (34 pages)
- Technique Demonstration (18 pages) - oil pastels and tissue paper + oil pastels and watercolors/salt
- Teacher Instructions (5 pages)
- Pre/Post Assessment (1 page)
- Definitions (1 page)
- Rubrics and Labels (3 pages)
- Word Wall Words (8 pages)
- Drawing Activity (7 pages) - Includes Roll & Draw and Choice Drawing Pages
>>>>> A total of 77 pages
✨ Check out the preview to see this resource in detail ✨
What happy teachers are saying:
⭐️⭐️⭐️⭐️⭐️
I loved how this is a very STEM oriented activity! The students loved how they could make their own snowflakes and be creative about it. I loved this resource!
~ Dea K.
⭐️⭐️⭐️⭐️⭐️
My students loved this activity. I taught them how to draw a straight line and how to measure angles with a protractor so that they could draw guidelines for their snowflakes. They loved rolling the dice to select the next shape. The end products turned out great and made a very nice bulletin board.
~ Laura B.
⭐️⭐️⭐️⭐️⭐️
My students really enjoy these activities - so I have invested and purchased many. I love that there are so many options within these - and they come with amazing step by step directions. We do a lot of the roll- a - drawing as early finisher activities, students loved that they could do multiple times with different results each time. This would also be an easy to use sub lesson since students are able to use it with minimal supervision or instruction (especially for upper grades) from the teacher.
~ A Colorful Mixture
Art Supplies:
If you want to simplify things, you can just have students draw snowflakes for a spontaneous lesson and color the background with crayons or colored pencils. However, if you want to do the technique from the technique demonstration, you will need either oil pastels (white) and tissue paper or oil pastels (white) and watercolors & salt.
You can see a little more info about how snowflakes get their design in my blog post:
Why are no two Snowflakes are Alike?
❆ This integrated lesson brings art, science, and math together in a fascinating lesson! ❆
Stay Connected
Thanks for visiting!
Expressive Monkey makes engaging resources that help students build confidence and express themselves through ART!
Oh, wait! Don't forget to follow me on Teachers Pay Teachers ... just click to follow!
Created by Stacey Peters, © Expressive Monkey
Permission to copy for single classroom use only.
Please purchase additional licenses if you intend to share this product.


